
We knew that upgrading to a smart thermostat was a must after we moved into our Cincinnati house. Similar to our master bedroom window treatment selection, it wasn’t a straight-forward decision.
The thermostat that came with the house was a new (as was most of the mechanicals), but it was the most basic model. It didn’t have any automation or advanced controls. 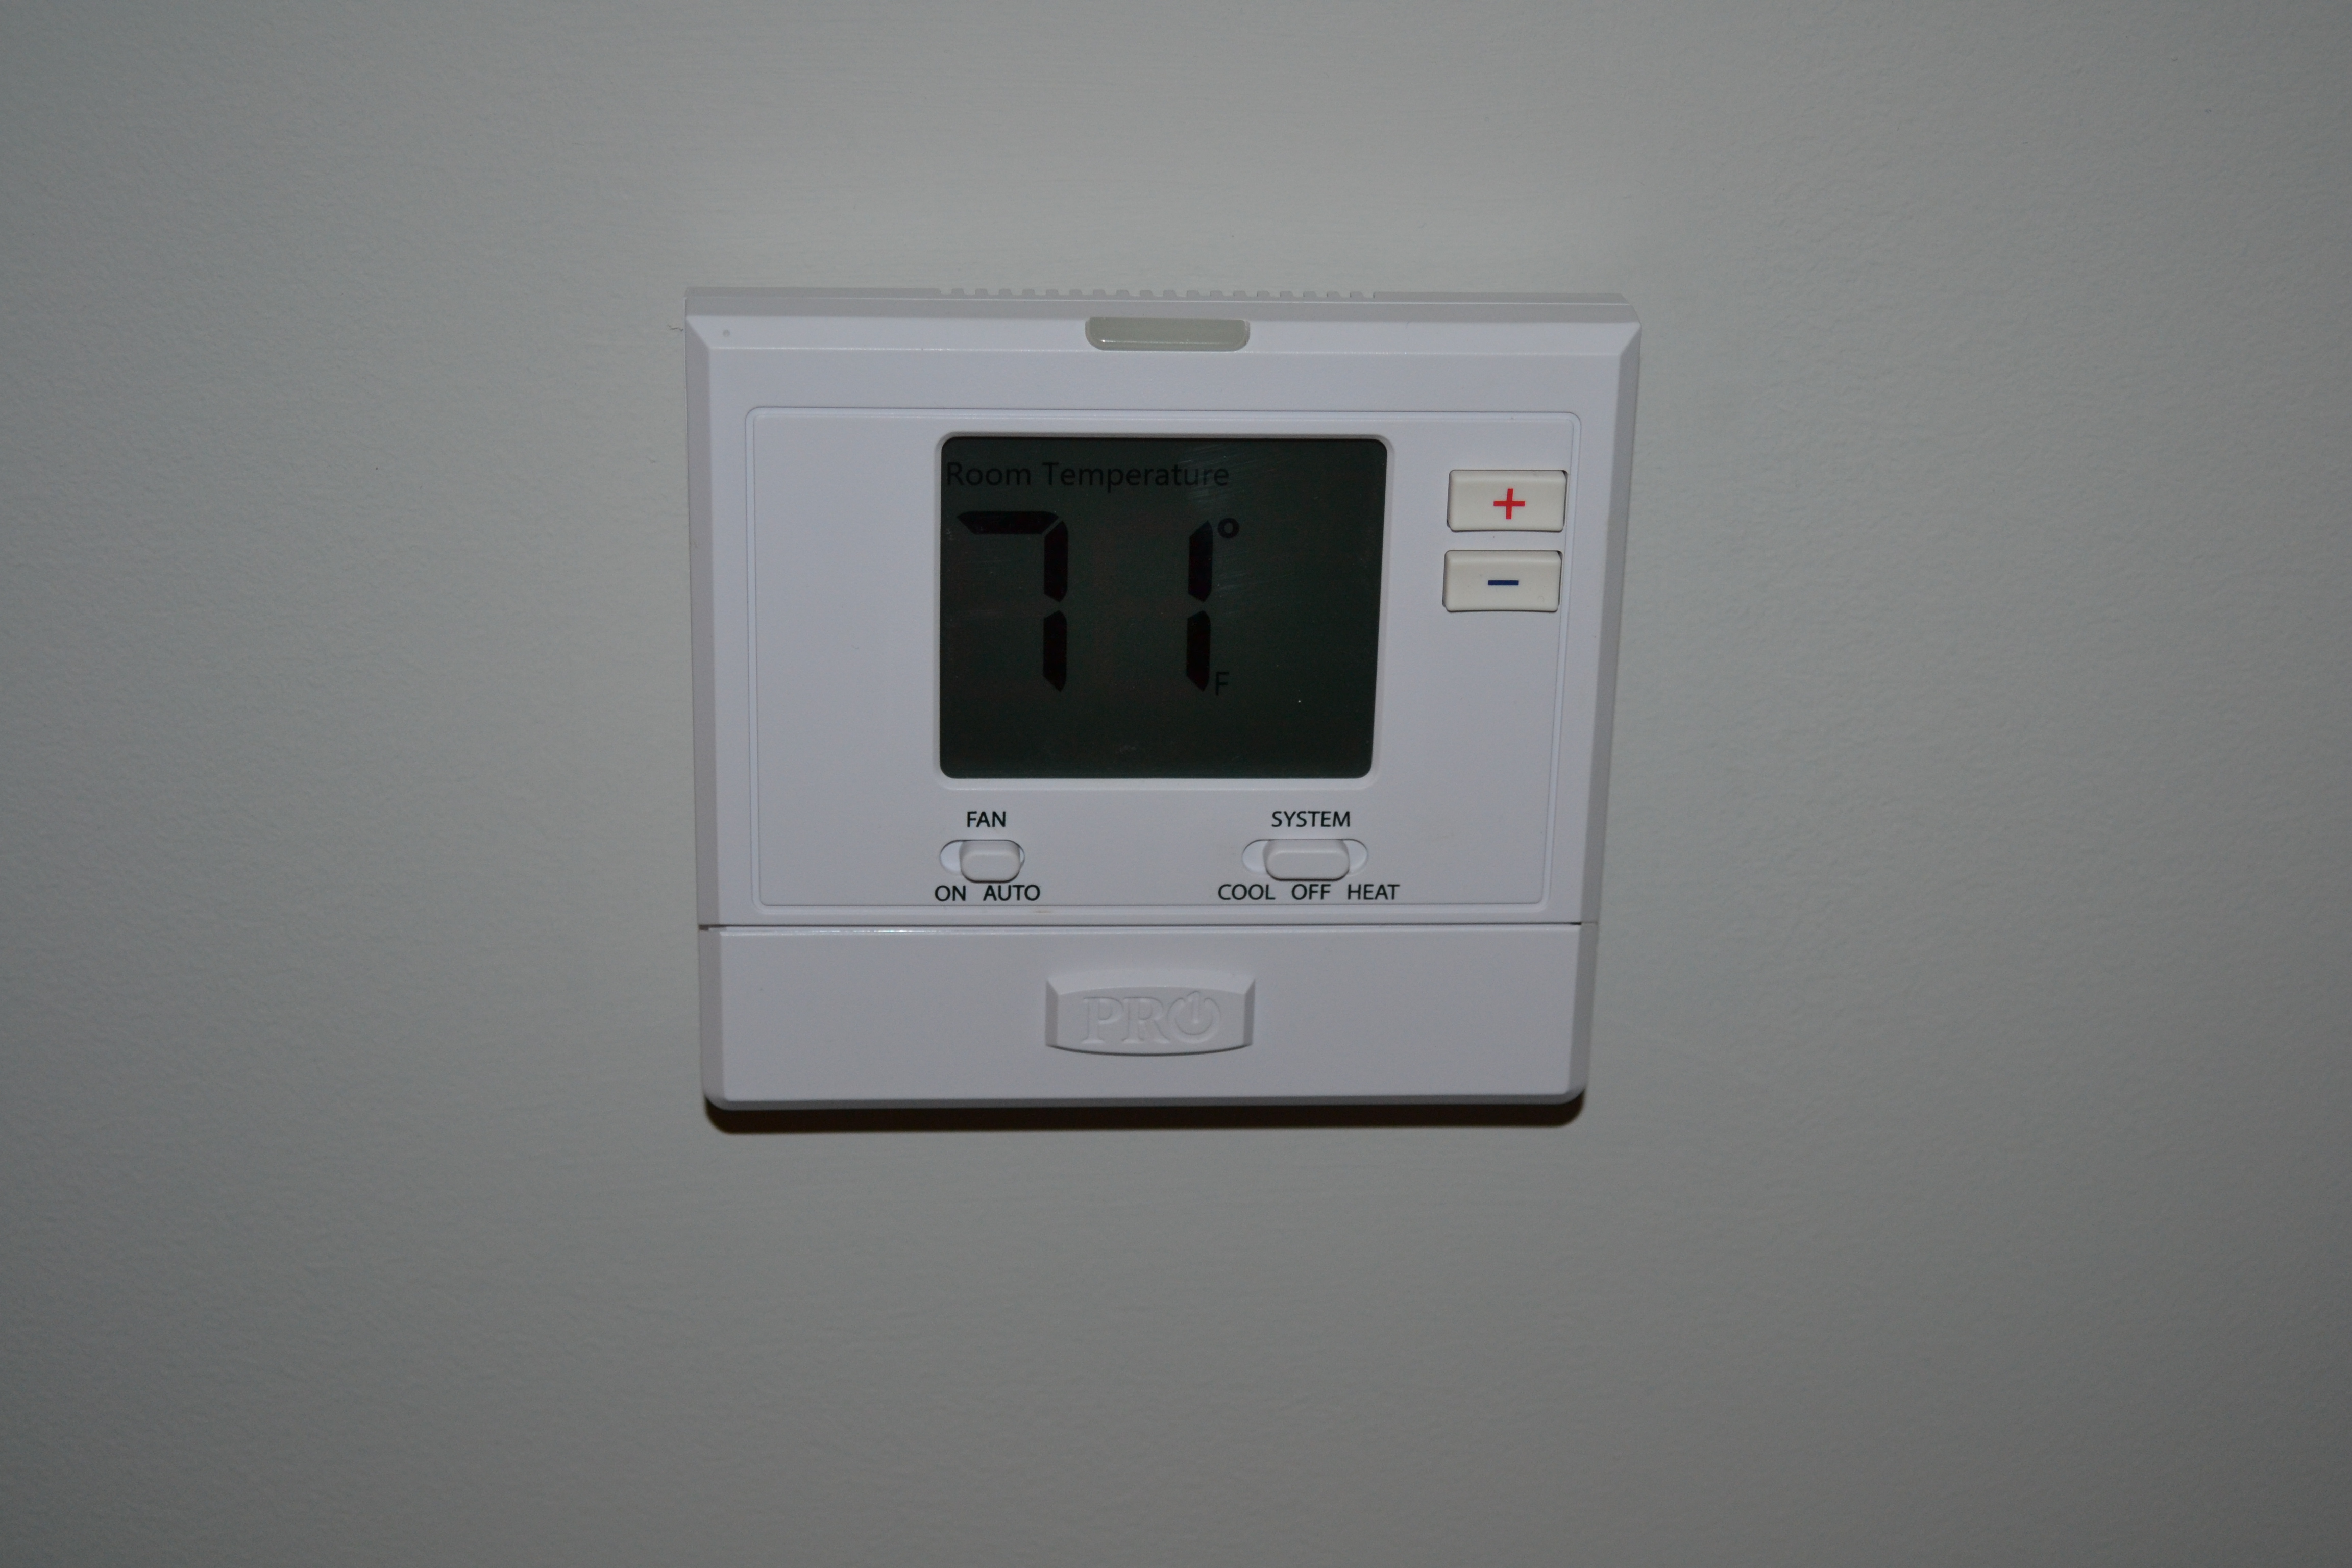
Comparisons
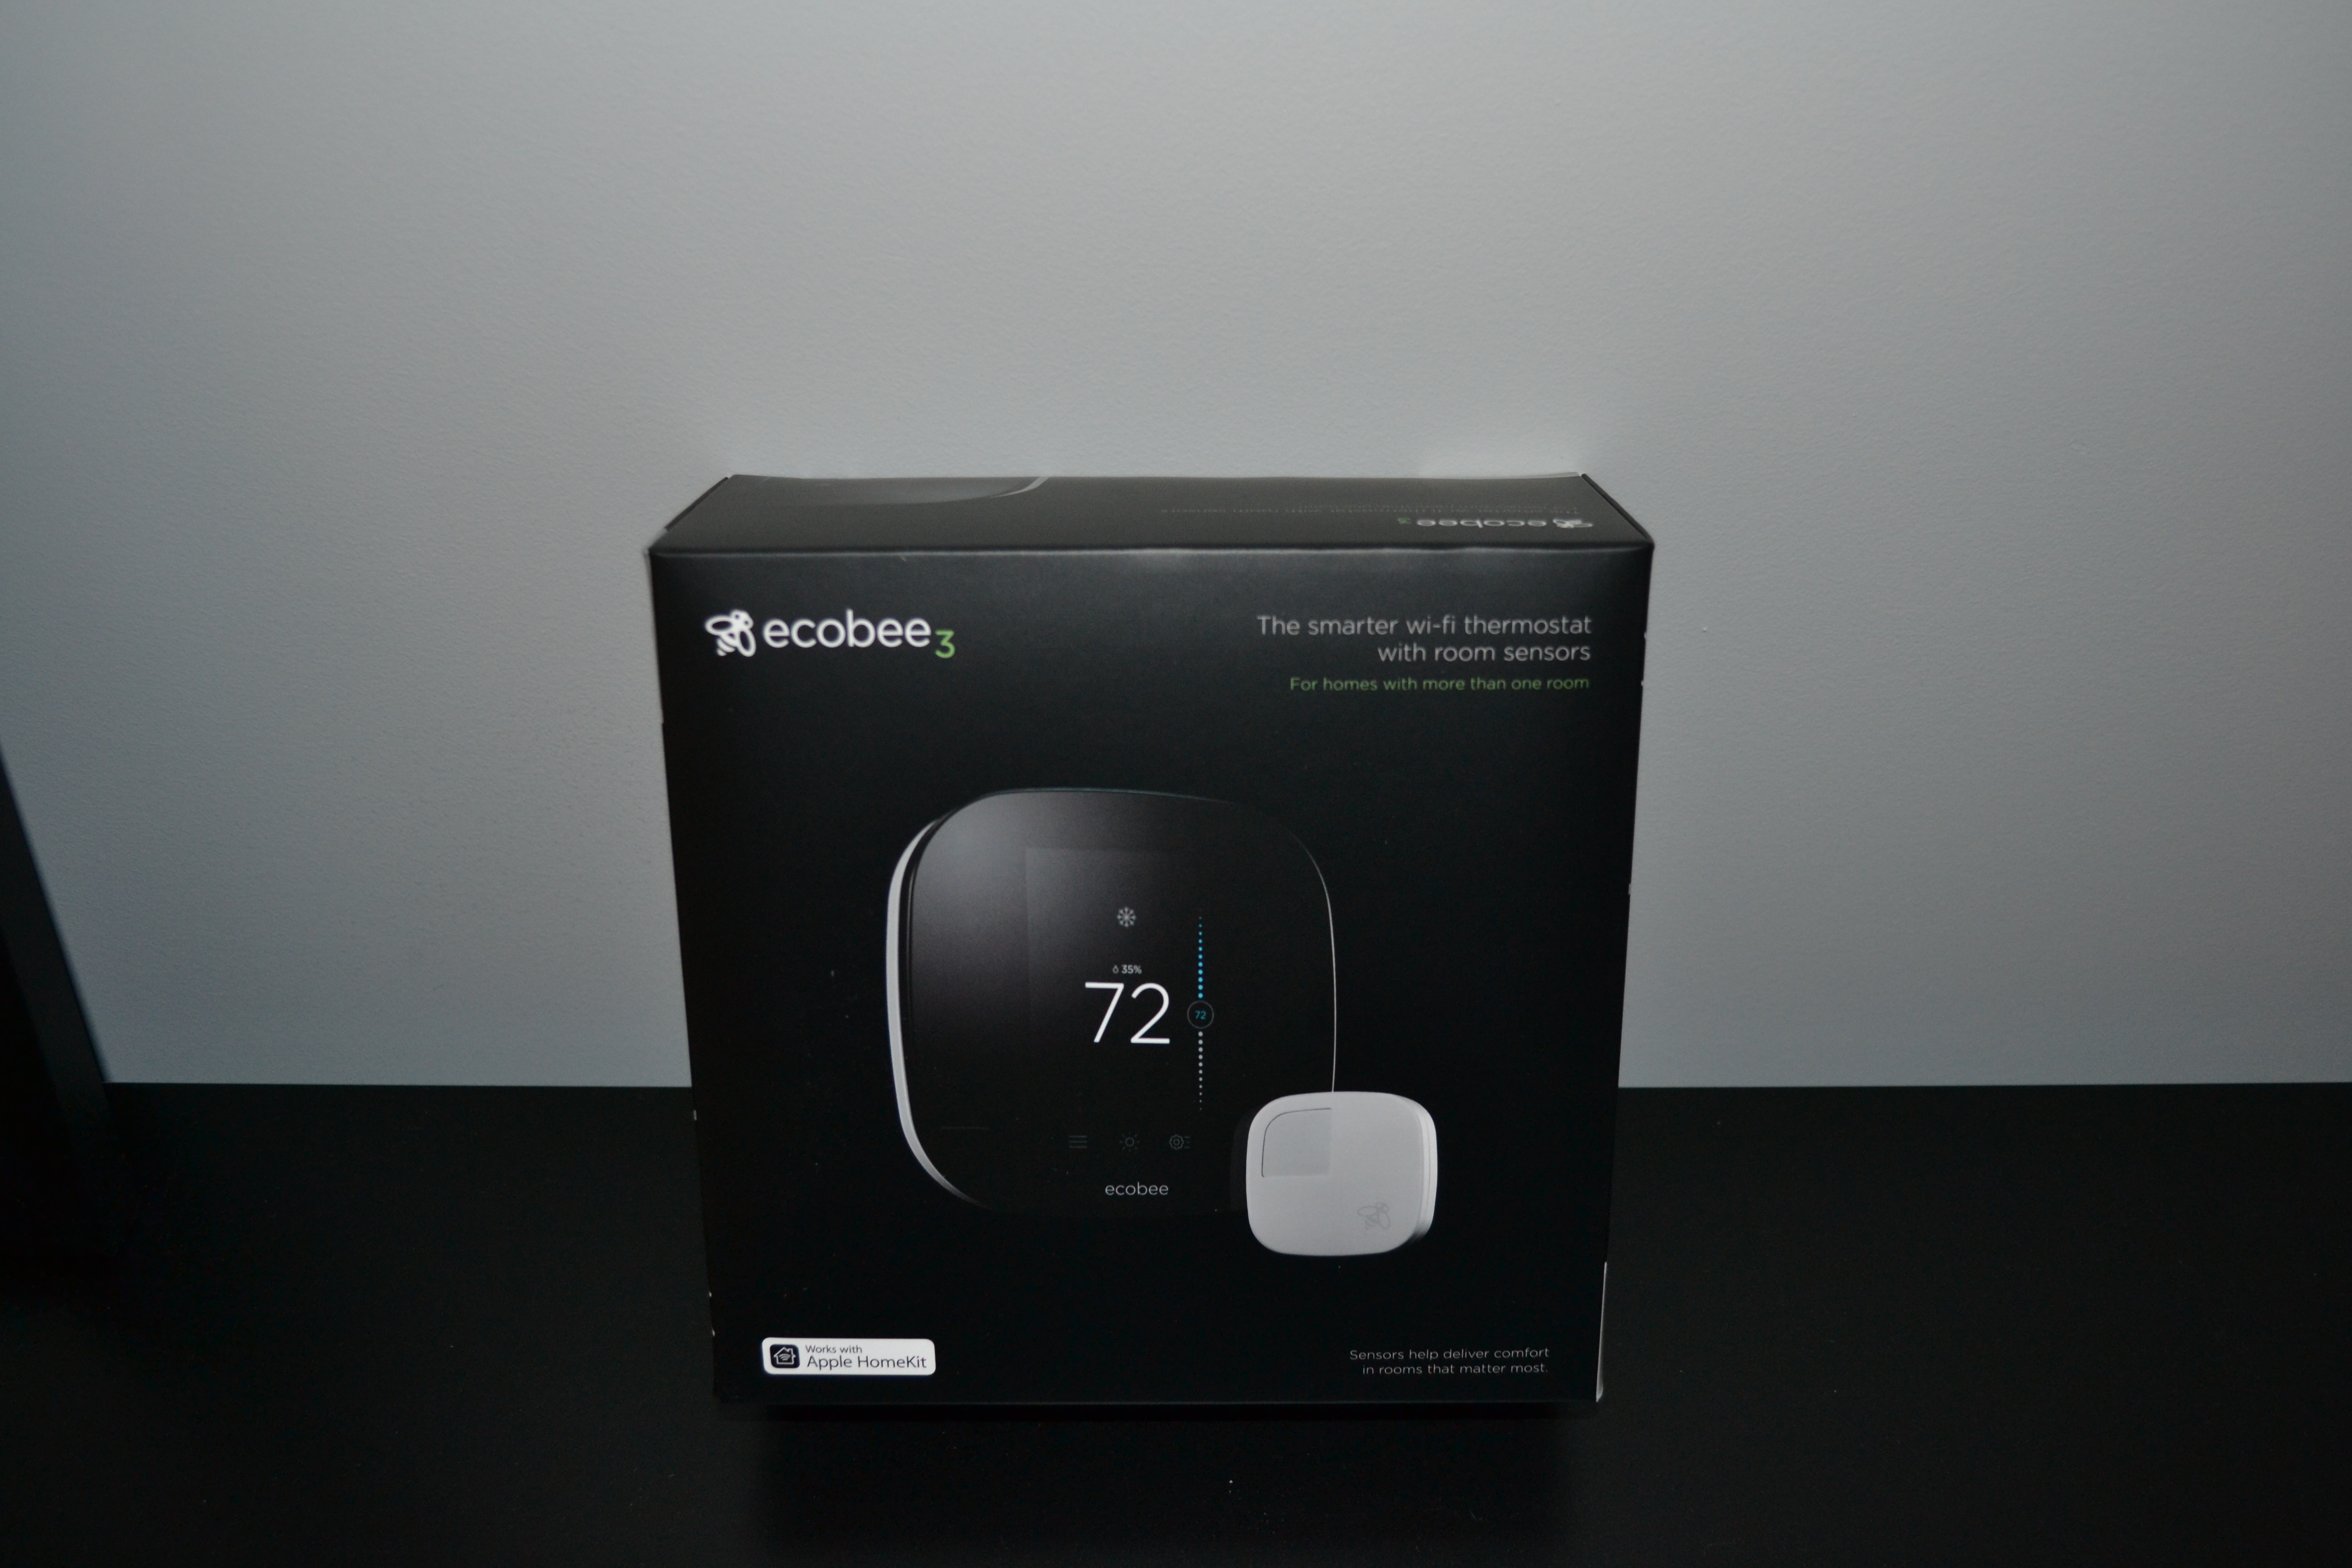
Before ordering the ecobee3 we talked to a few people who have Nest Thermostats and we also did online research. My favorite comparison article was from All Home Robotics, which includes 3 bottom line bullet points and a quiz (you know me and online quizzes!). The quiz helps determine which thermostat is best for you, and the results include all smart thermostats, including the Honeywell Lyric, ecobee, Nest, Vine Smart and Emerson Sensi Thermostats. If you want to do more reading there are other thorough comparisons out there like this one from CNET, this one from SafeWise, and this one from ecobee.
What really sold us on the ecobee was the Open API for when we want to tweak the interface. Ha! Seriously though, when I was looking at the ecobee web site one of those live chat windows popped up and I asked about the warranty if it’s purchased through Amazon. (Yes, the warranty still applied). The ecobee3’s sensors were also a selling point for us. Our house is a 2-story, but the majority of our time is spent on the 1st floor. So, we want to be comfortable on a daily basis but we also want to ensure our visitors are comfortable when they’re upstairs in the guest bedroom.
Installation

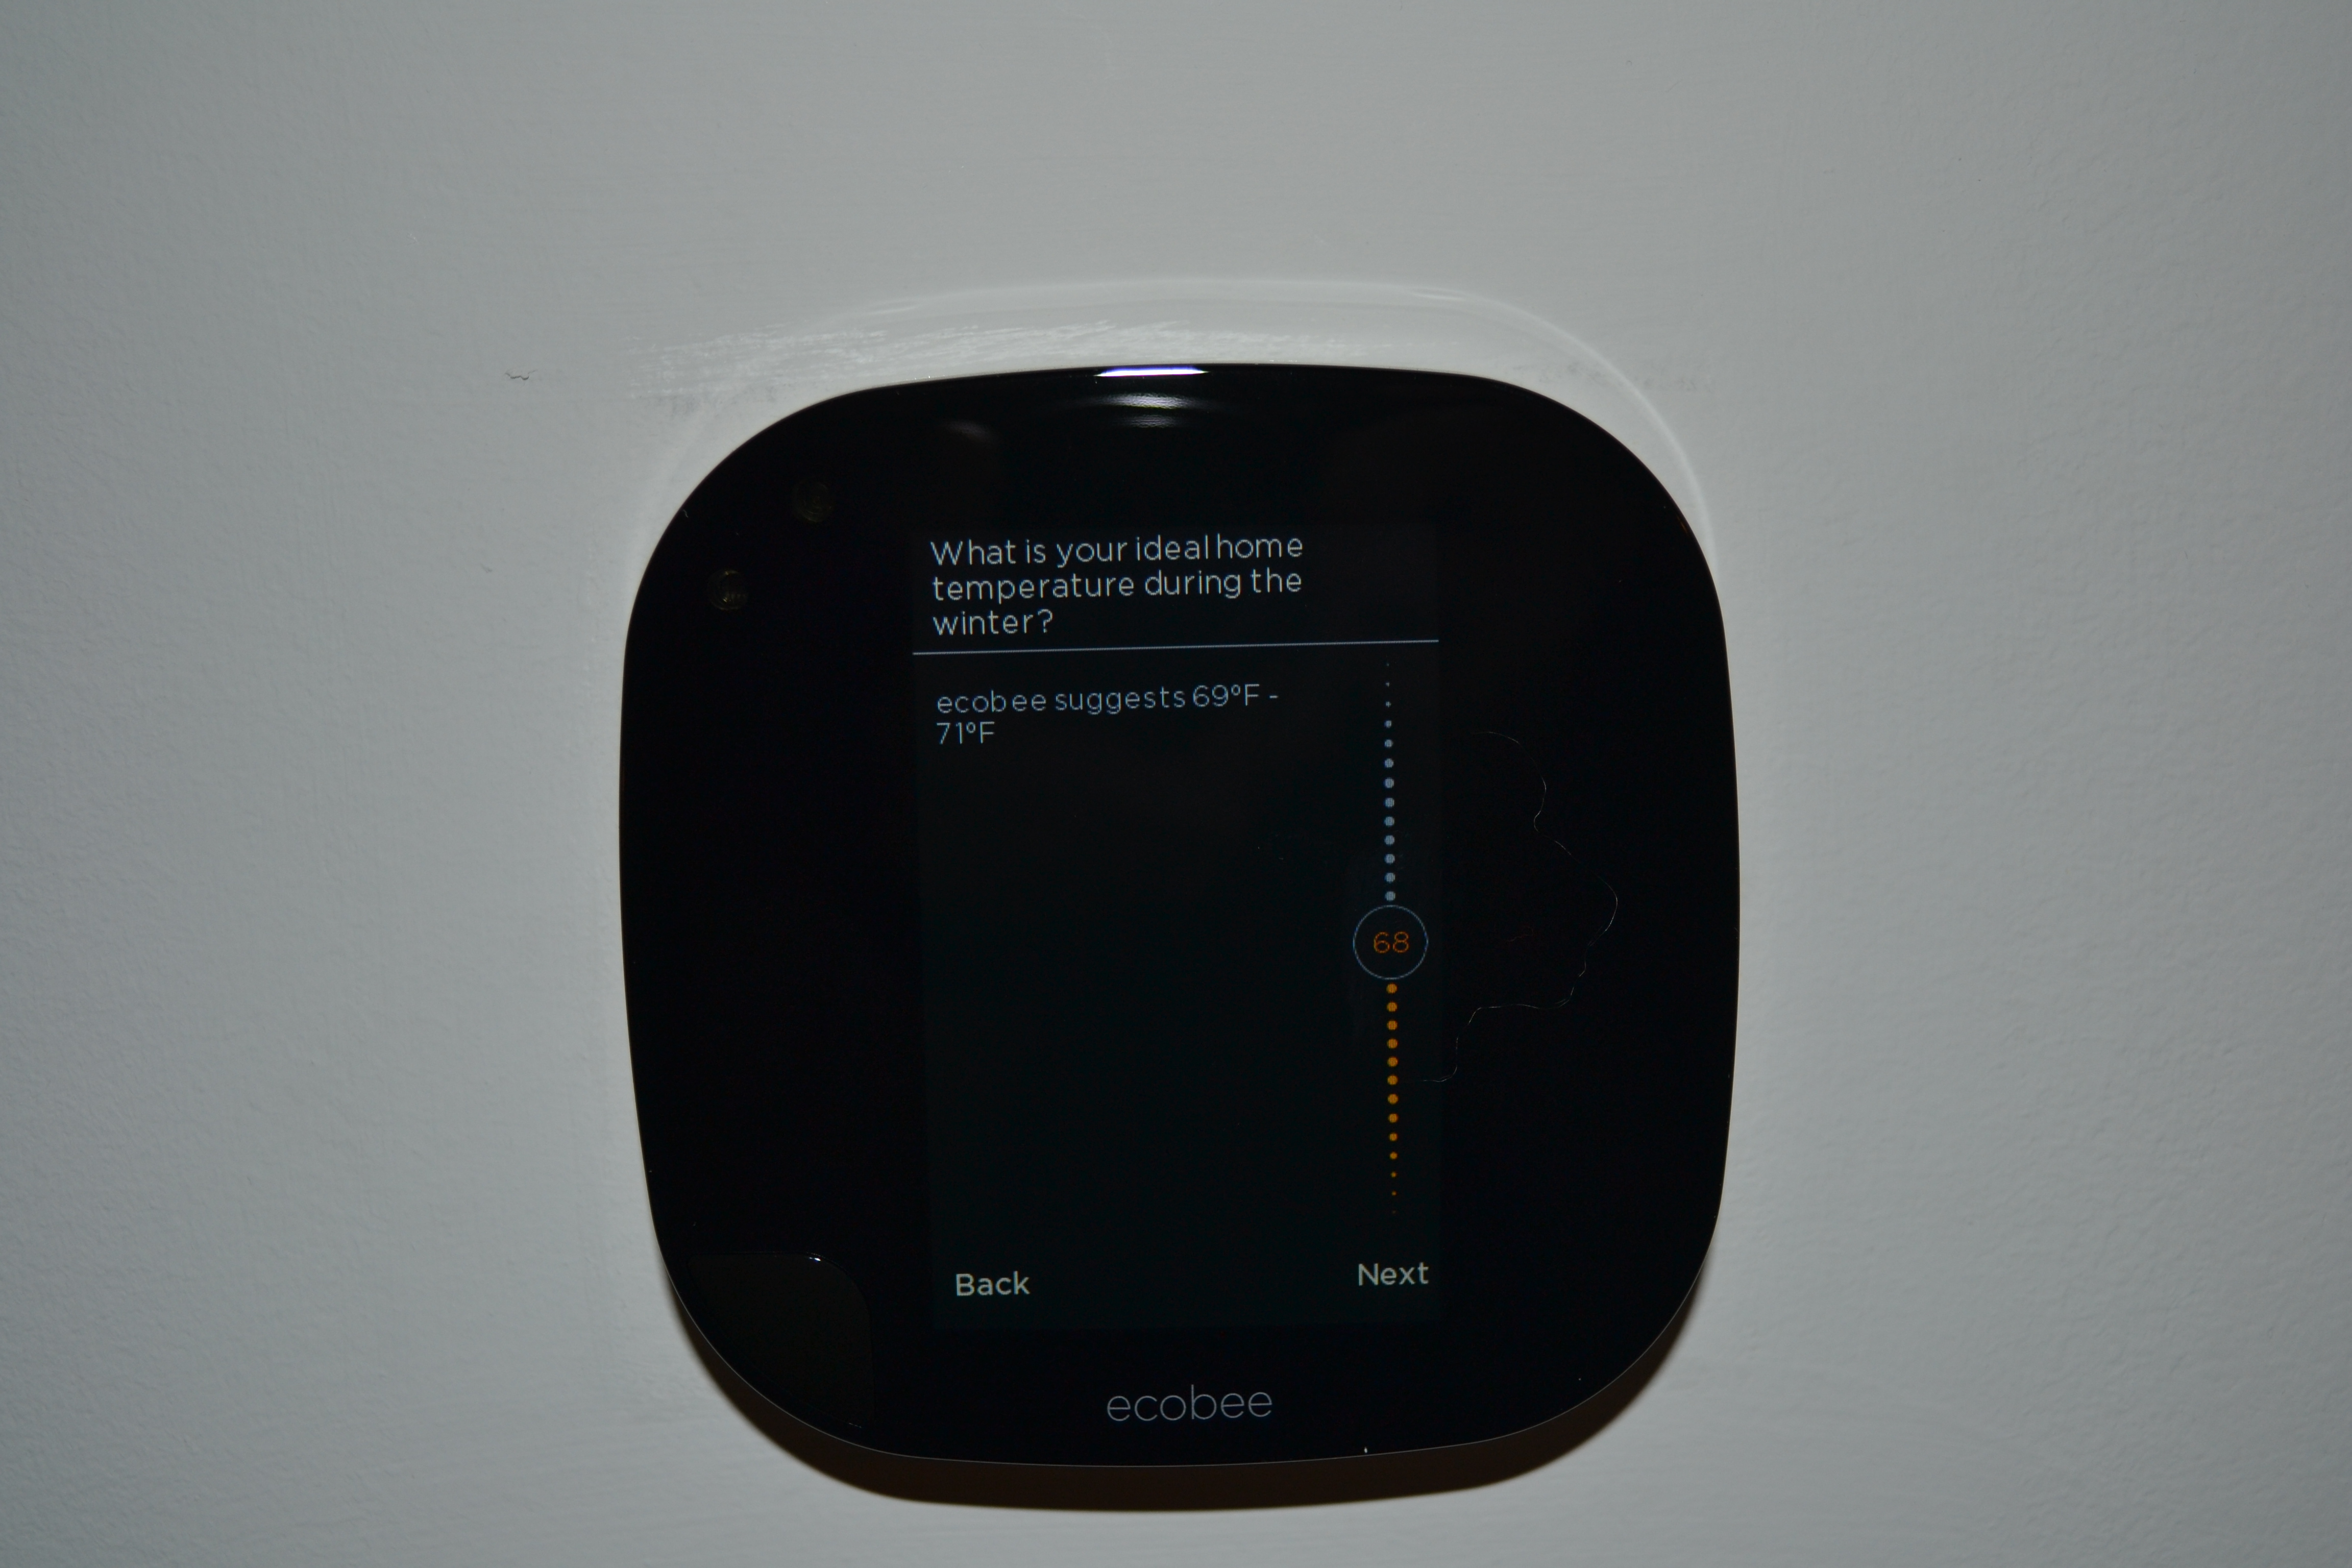
We didn’t want to hire anyone to install the thermostat so we researched the installation and found this detailed (and funny) article on how to install it.
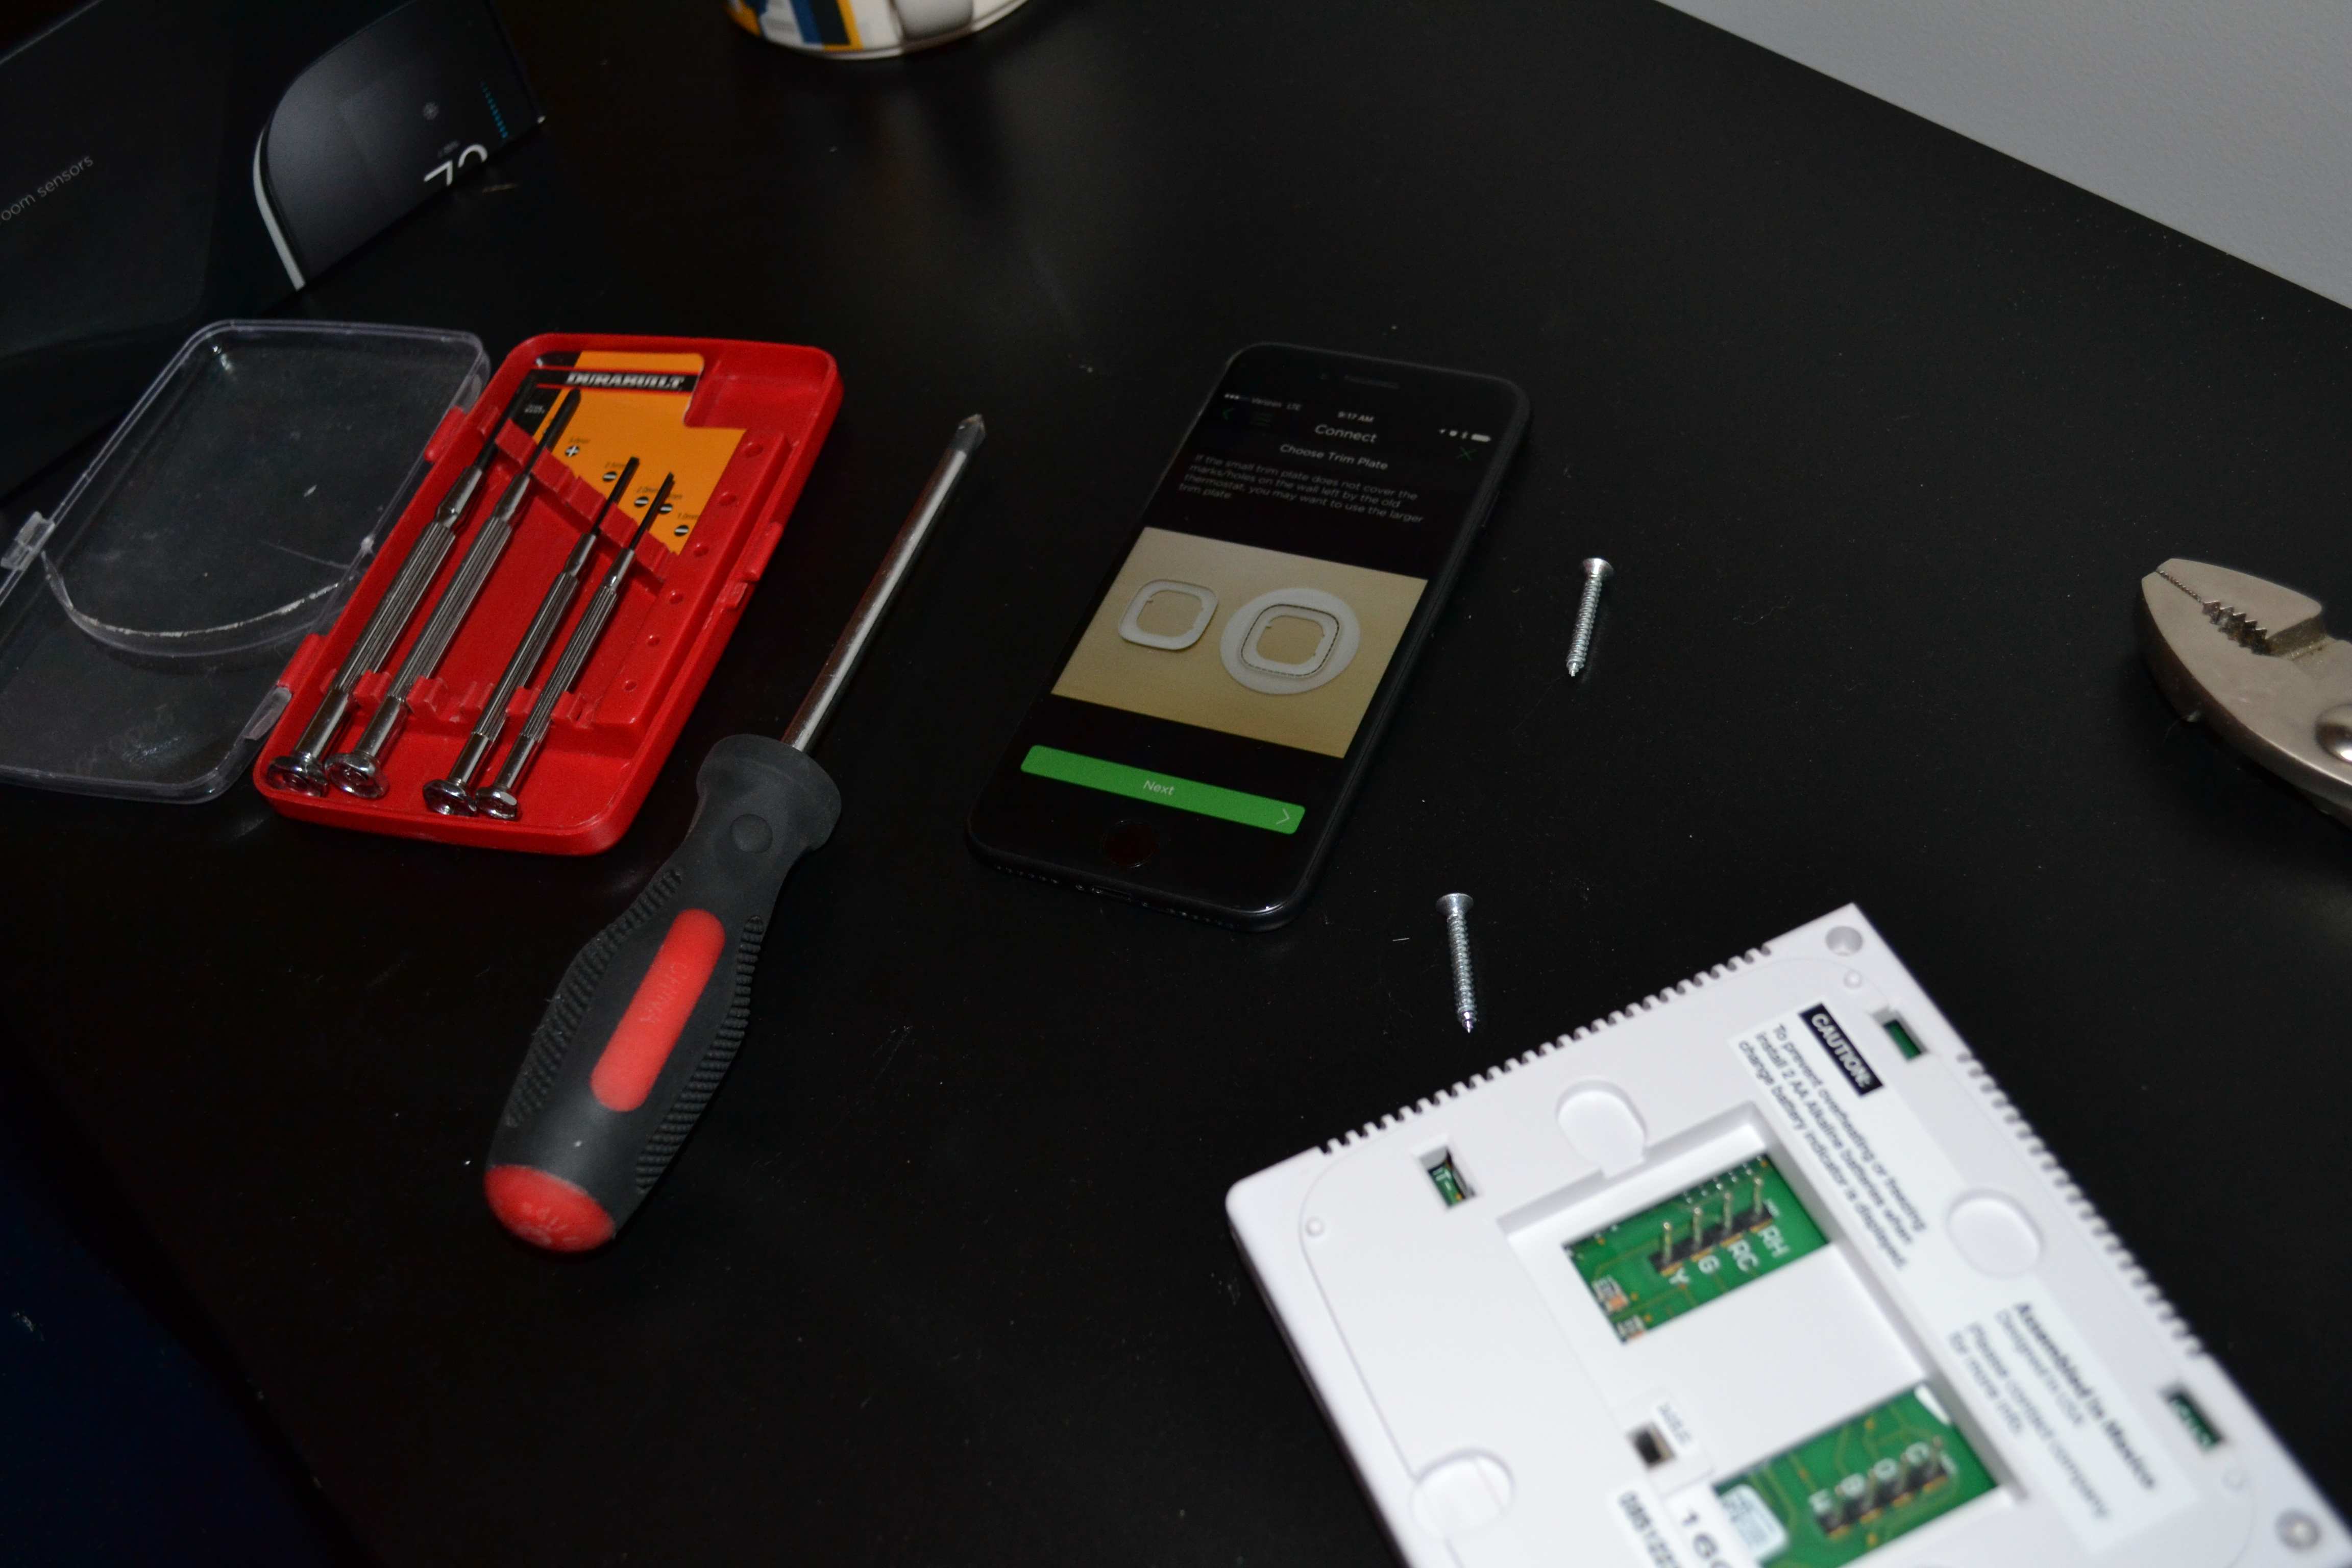
The install instructions were also available through the ecobee3 app. The app also give you access and control of the system, from anywhere!
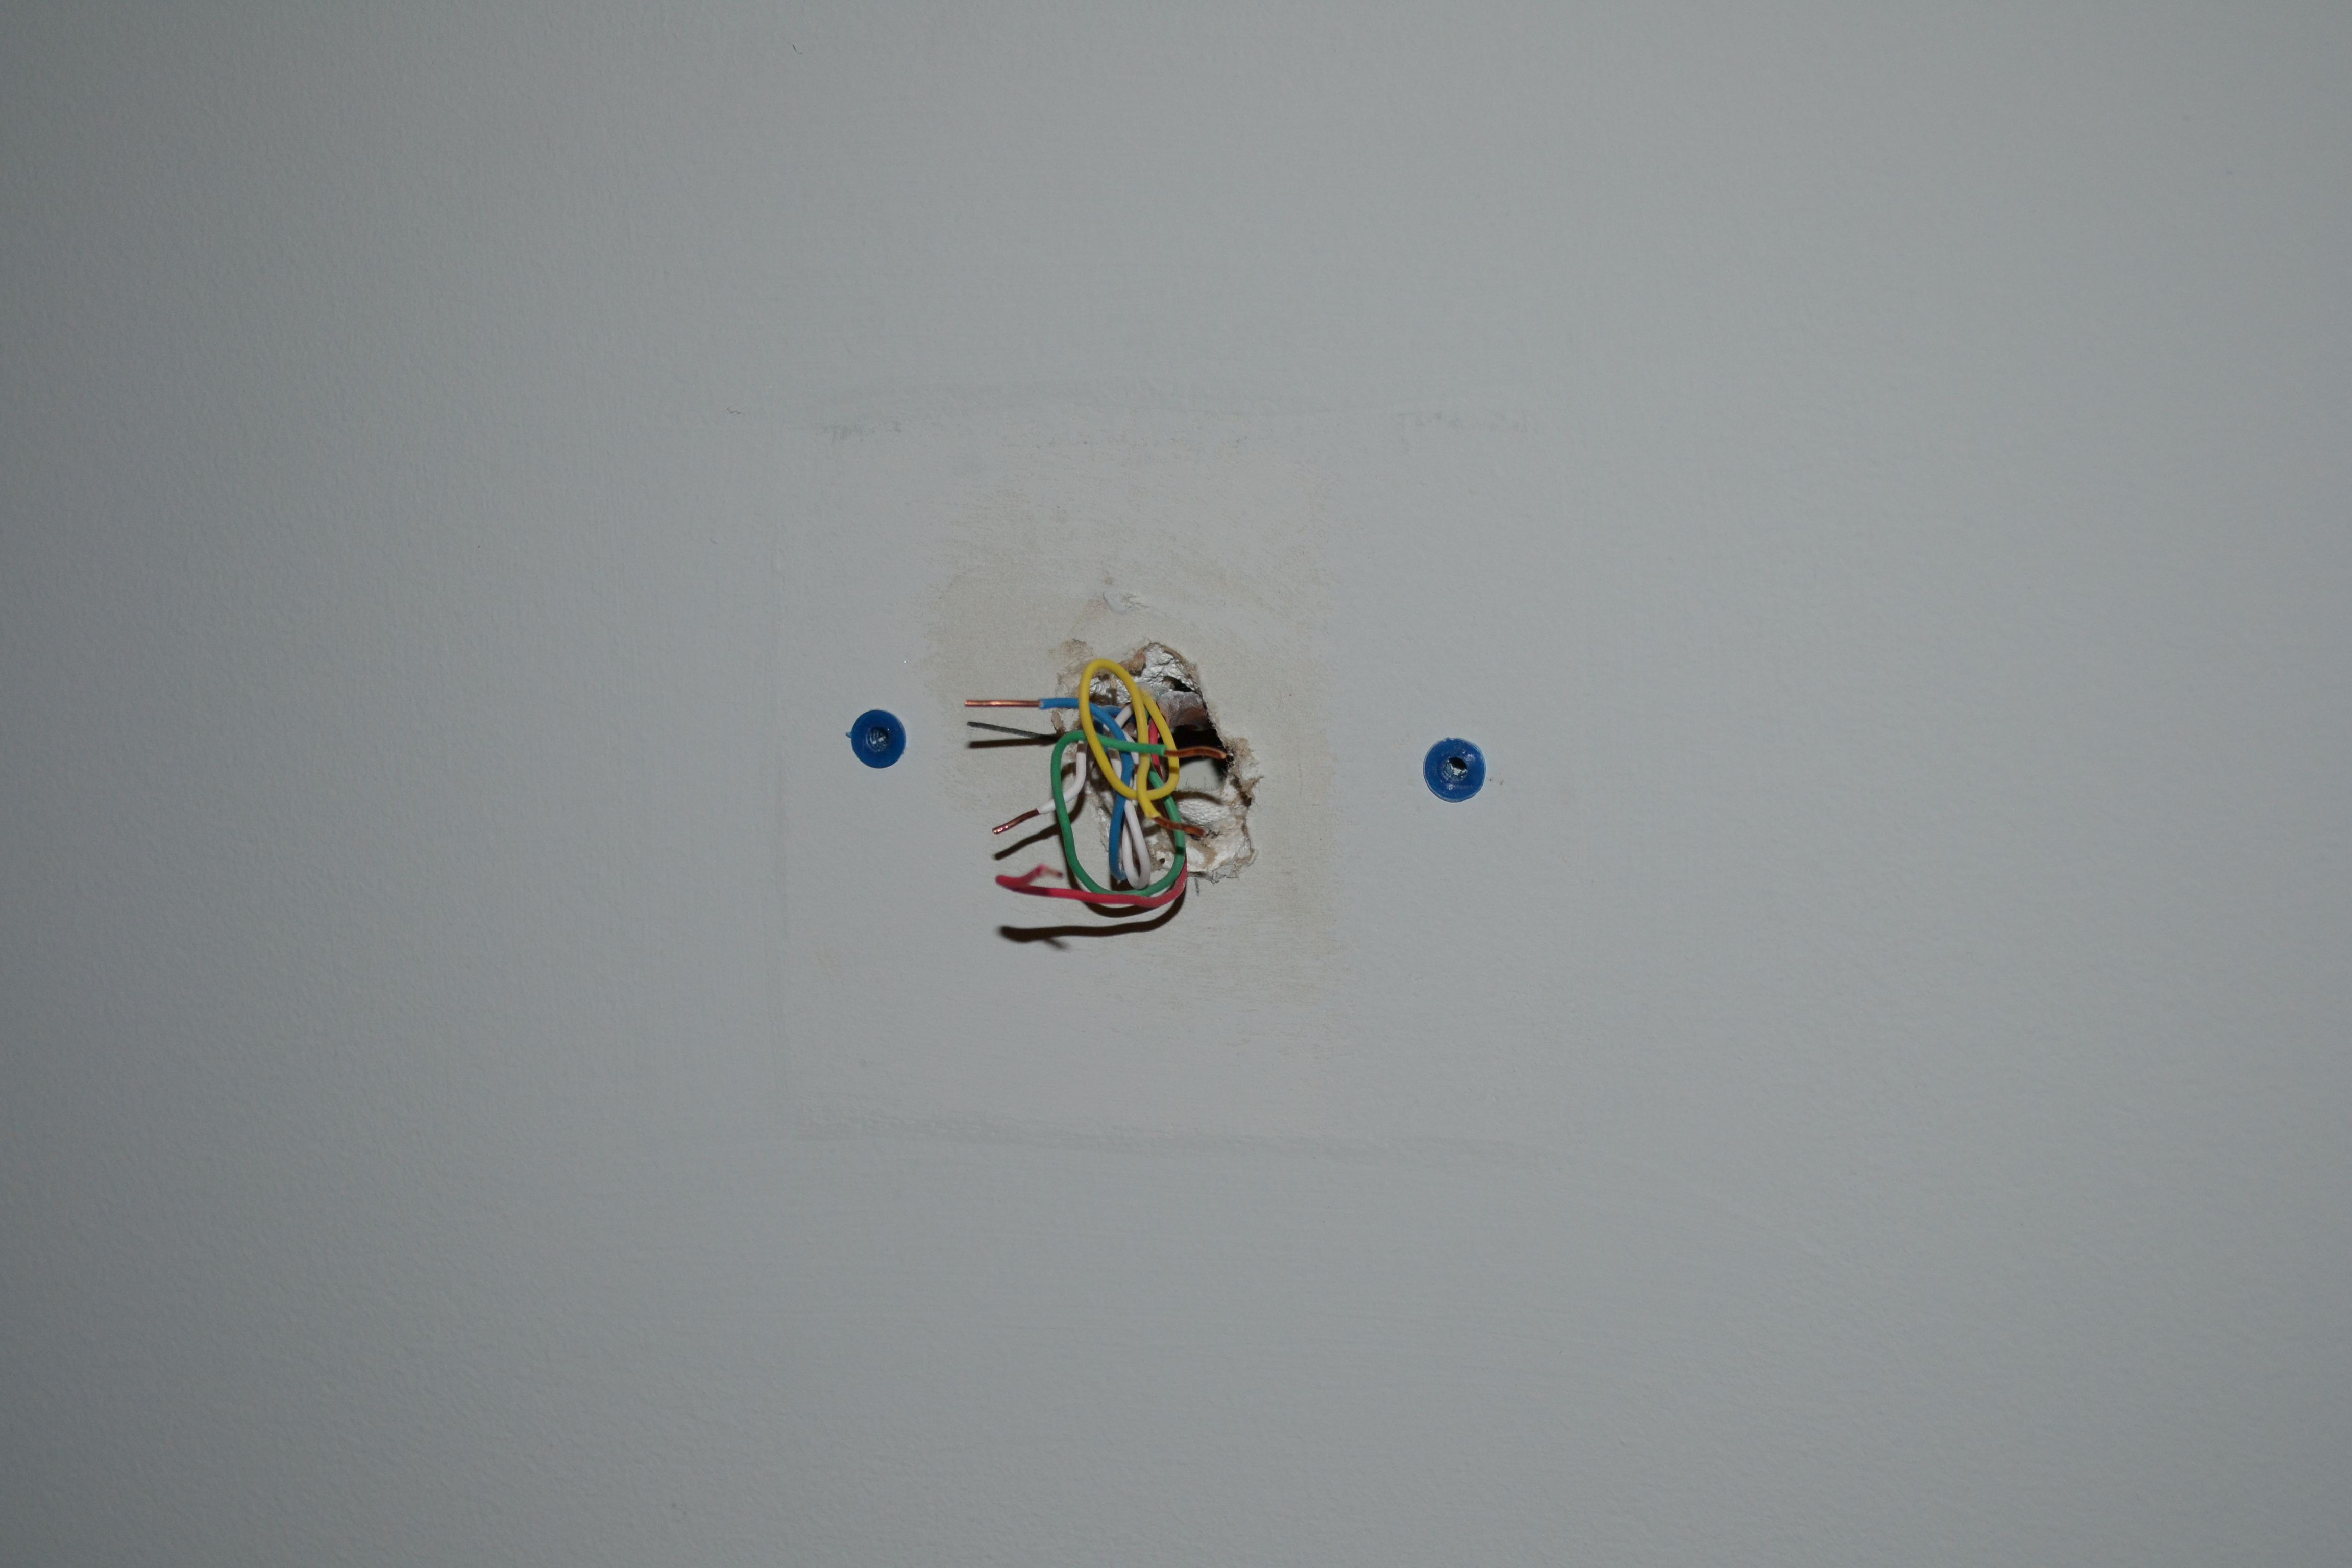
Once we removed the previous thermostat we were left with a bunch of wires. Thankfully, it was pretty straight forward getting them all connected to the ecobee3.
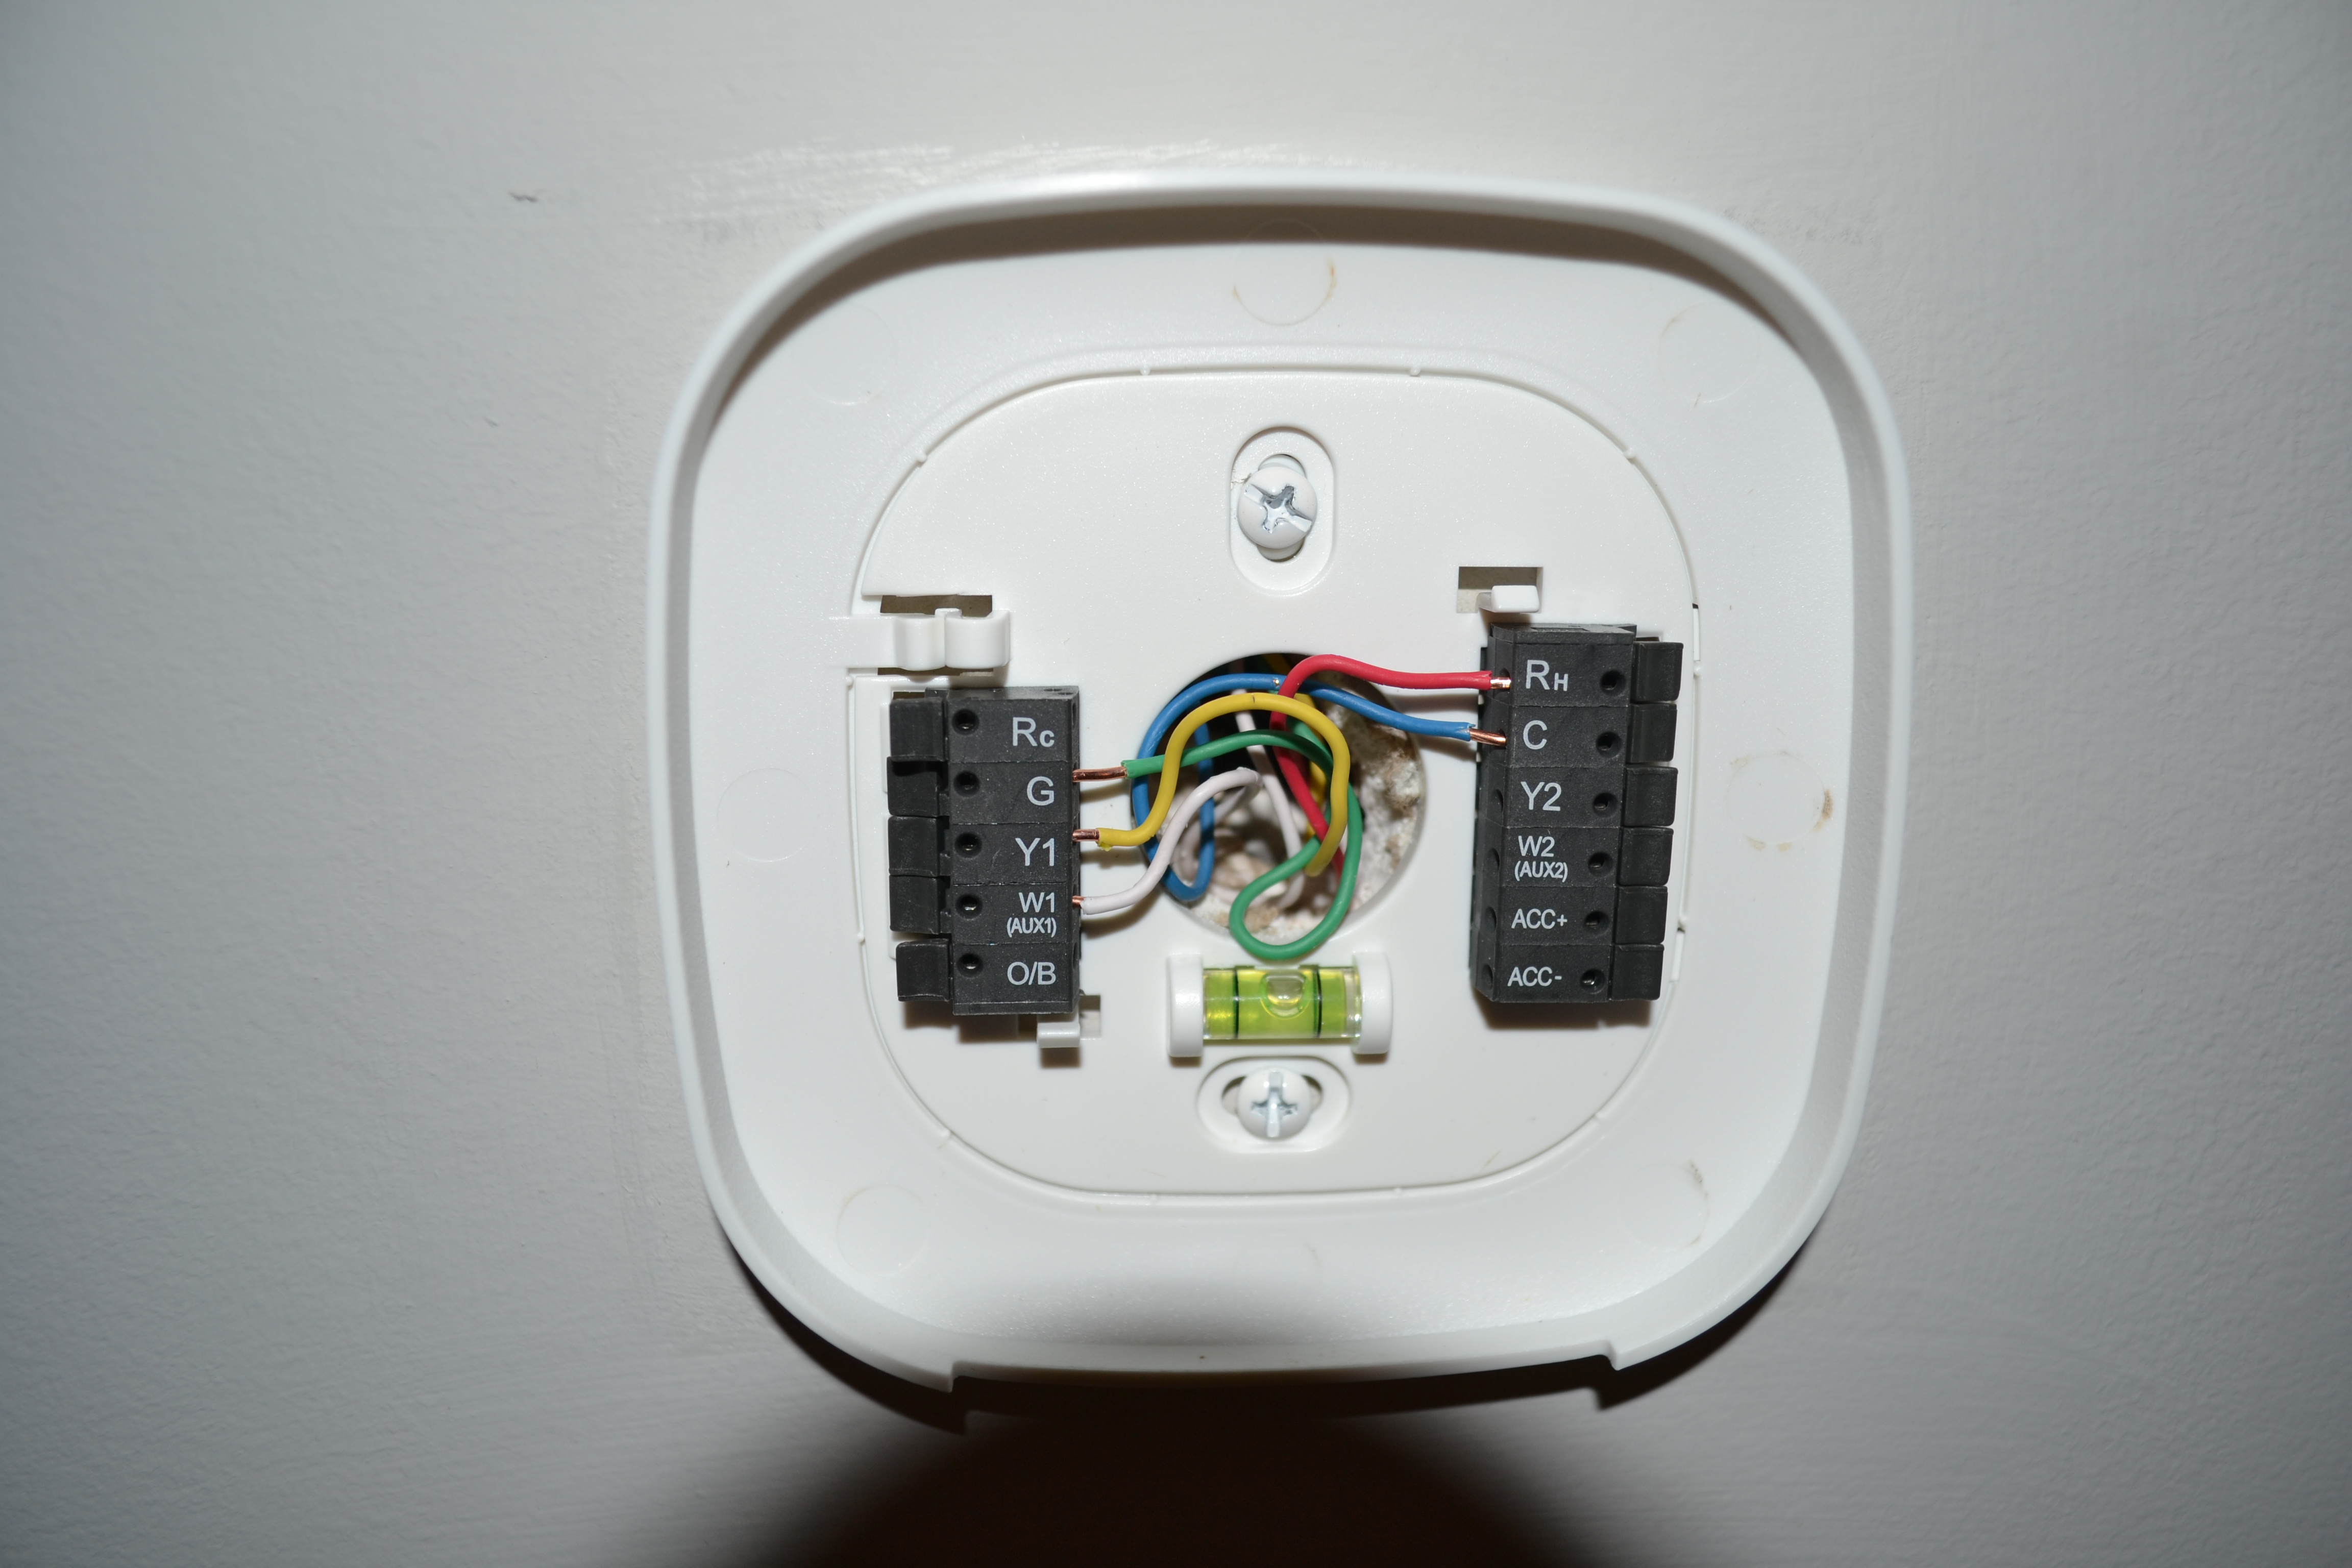
Sorry for the shadow… The base plate even had a built-in level! It required some small hands and tricky maneuvering to get all the wires connected and pushed back into the hole.
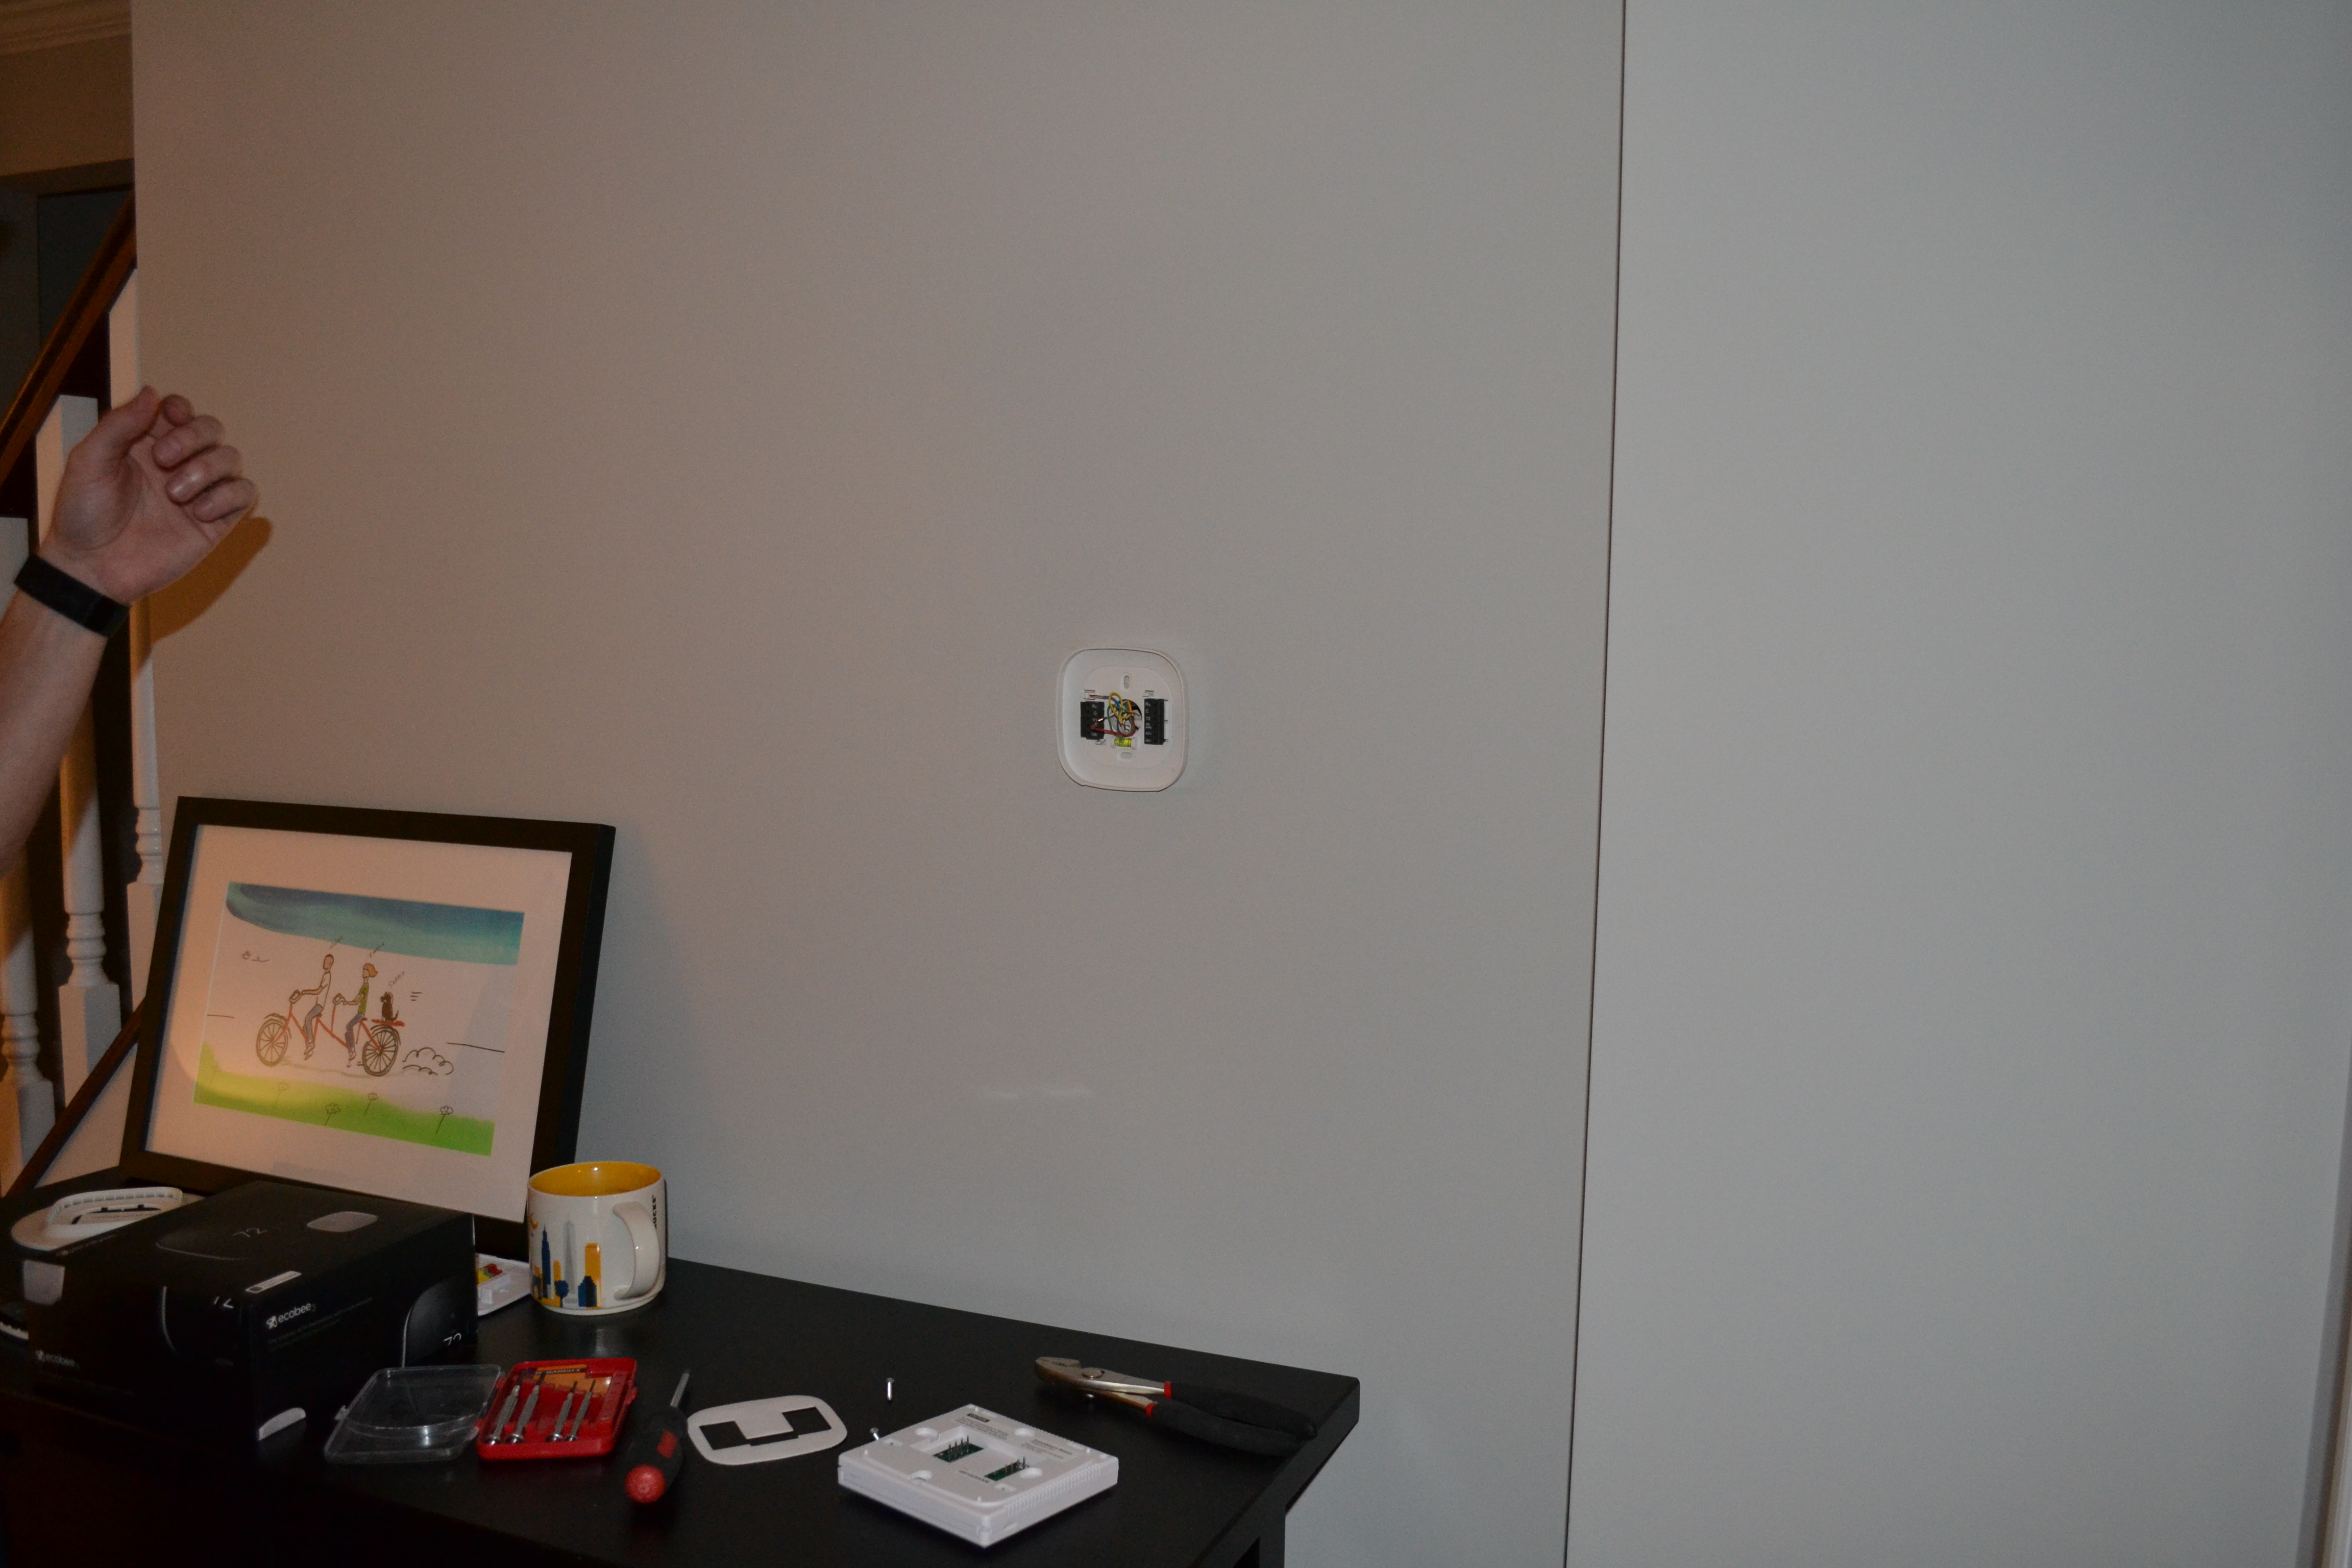
There were two different size plates, we went with the smaller one. You can see how much smaller it is than the old one that sitting on the table.
Using the ecobee3

The whole point of the ecobee3 is that it “learns” your behaviors and adjusts accordingly. It’s in the formal living room and the other sensor is in the guest bedroom upstairs. We noticed that if we’re in the family room or kitchen and don’t walk by it, it thinks we’re not home and turns the temperature up. (Yes, we already have the air on.)

So, we ordered two more sensors and put them in the family room and our bedroom. After getting the two additional sensors it seems to be working great! I haven’t installed the app yet (my iPhone is out of memory!). So, I annoying ask Nolan all the time, “what’s the temperature in this room?” 😛
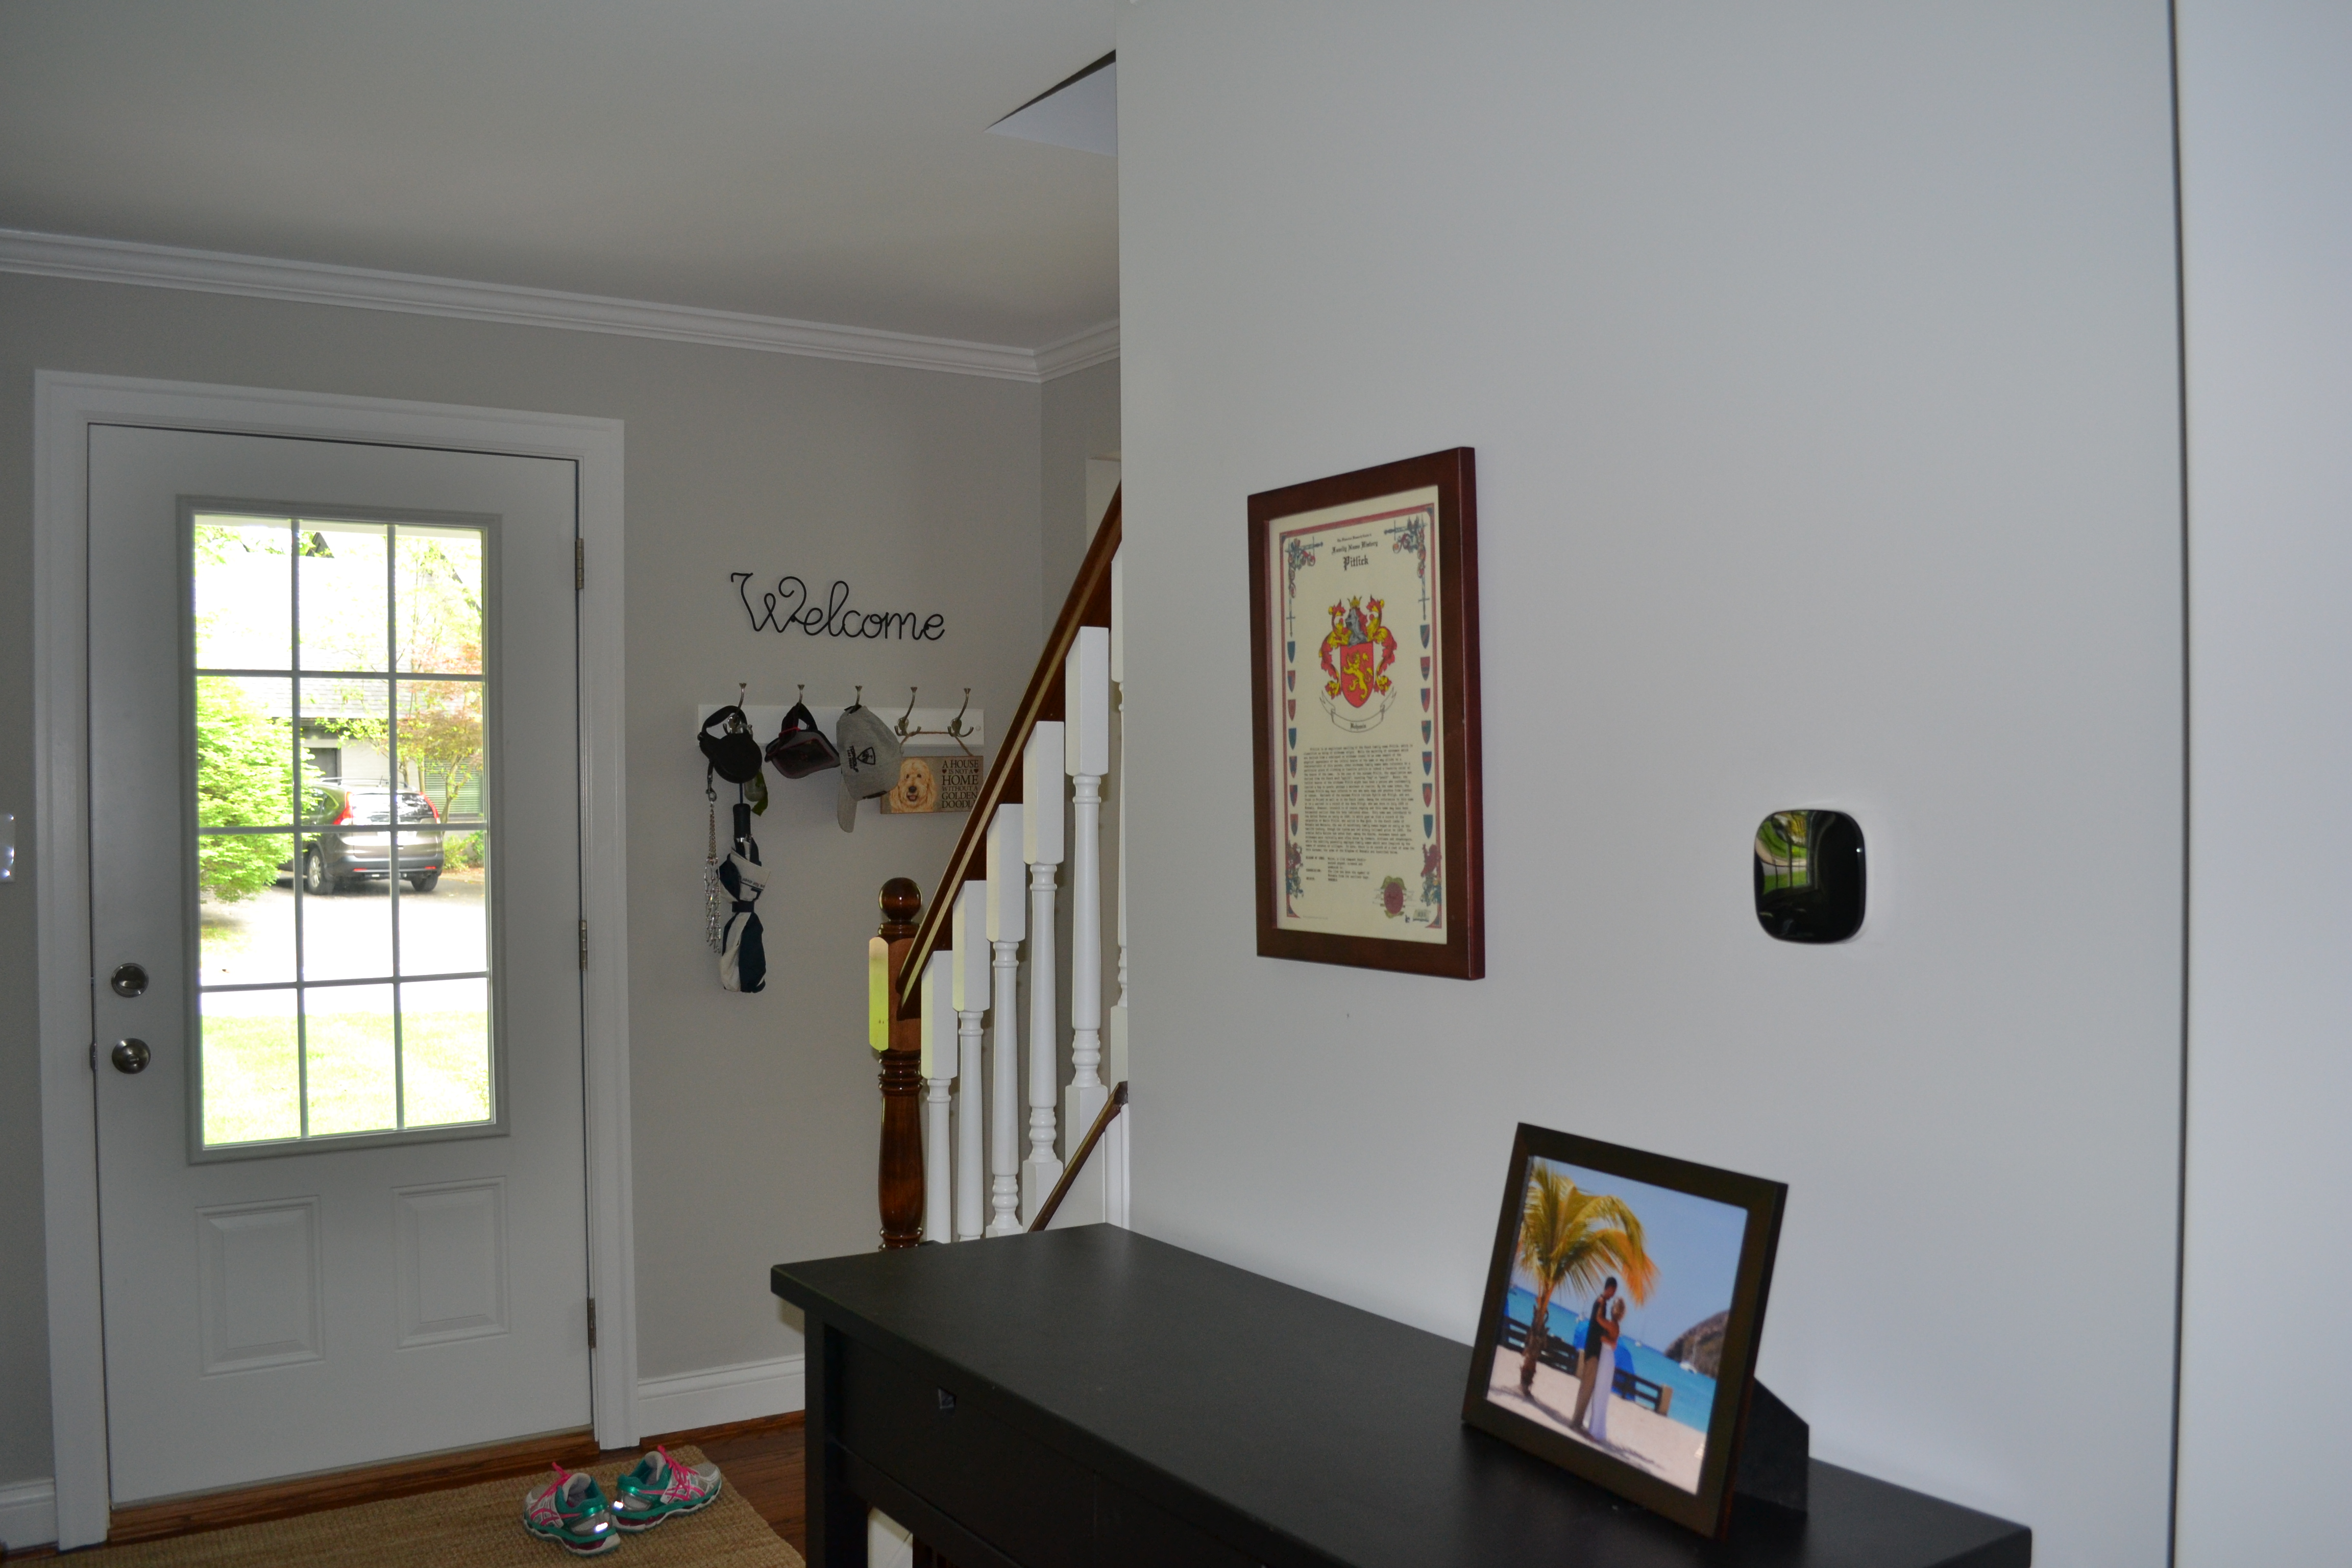
PS: I haven’t finalized the decorating in the formal living room. That side table is from our old dining room, but doesn’t fit in our new dining room. And while it doesn’t really fit in our formal living room, it’s going to be its temporary home for awhile.

Nice job! Super clean install (and I’m glad my install article helped!). FYI – the new ecobee4 shipped yesterday, so if you recently purchased the ecobee3, you may want to consider returning for a refund and going with the ecobee4! 🙂
Thanks! I like sharing all the details of our research and decision. I saw the new ecobee4 just came out, talk about bad timing! 🙂